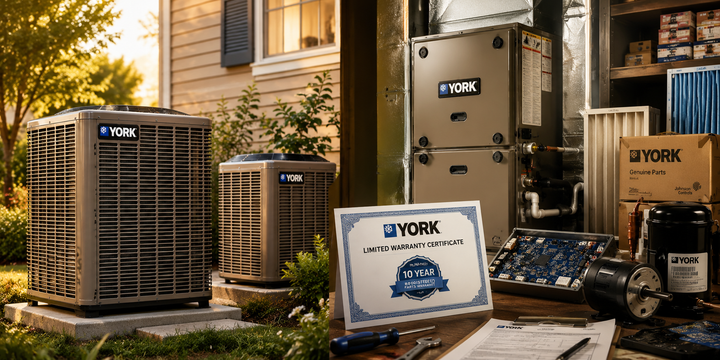
A residential central air conditioner that will not start, will not cool, or trips the breaker is almost always one of five parts: the dual-run capacitor, the contactor, the condenser fan motor, the compressor, or the control board. The diagnosis is a sequence of five quick measurements — capacitance here, continuity there, resistance to ground on the compressor — and the first measurement that fails points to the single OEM part to order.
The quick answer: humming with no fan = capacitor. Clicking contactor with no start = contactor. Compressor runs, fan silent = fan motor or fan side of the capacitor. Breaker trips on start = capacitor, contactor, or seized/shorted compressor. Nothing happens with power confirmed = tripped safety or control board. Shut off the disconnect, discharge the capacitor, and start measuring.

Why chat-style diagnosis beats parts-swapping on an AC call
The temptation on a hot summer day with the AC down is to buy a capacitor and a contactor and swap both as a first move. Together they cost around $50 and fix the majority of no-cool calls. The risk: the real failure is a $150 fan motor or a $400 inverter board, and $50 of consumables plus a long drive to the parts counter has not solved anything.
The chat-style sequence below — one question with a measurable answer at each step — isolates the fault to one component before anything gets ordered. It mirrors how experienced techs actually work: listen to the unit, note the symptom, pull the panel, measure, order the one correct part. No parts cannon, no guesswork, no second service call.
If you need brand-specific guidance, cross-reference against the York AC Troubleshooting guide, the Air Conditioner Buying Guide 2026, or the Repair vs Replace guide if the diagnosis points to a compressor on a 12+ year-old system.
Step 1: Identify the symptom at the outdoor unit
Question: “What is the outdoor condenser doing right now when the thermostat calls for cool?”
Set the thermostat to cool, setpoint 3 degrees below current room temperature. Walk outside to the condenser and listen. Five possible symptoms, five different starting points for the diagnosis:
- Symptom A: Humming, fan not spinning. → capacitor (most likely)
- Symptom B: Loud click at the contactor, nothing starts. → contactor (most likely)
- Symptom C: Compressor running, fan silent. → fan motor or fan side of capacitor
- Symptom D: Breaker trips immediately on startup. → capacitor, contactor, or compressor
- Symptom E: Absolute silence with power confirmed. → safety tripped or control board

Before any panel comes off, verify the basics: breaker not tripped at the main panel, outdoor disconnect in the ON position, thermostat set correctly, and the indoor blower is running (an AC that will not cool because the indoor blower is off looks identical from the thermostat to a condenser failure).
Step 2: Shut off the disconnect and test the capacitor
Question: “Does the dual-run capacitor read within 10 percent of its printed MFD rating?”
The dual-run capacitor is the first thing to test on symptoms A, C, and D. It is the cheapest common failure, the easiest to measure, and the fastest to replace. Order of operations:
- Shut off power at the outdoor disconnect. Confirm with a non-contact voltage tester at the contactor's load terminals.
- Open the condenser's service panel (usually 4 to 6 sheet-metal screws).
-
Locate the capacitor — cylindrical, usually silver or black, with three terminals on top labeled
HERM,FAN, andC(common). - Discharge the capacitor by placing an insulated screwdriver across the HERM-to-C terminals, then the FAN-to-C terminals. A healthy capacitor stores enough voltage to deliver a painful or dangerous shock even with power off.
- Set the multimeter to capacitance (MFD) mode. Measure HERM-to-C, then FAN-to-C.
Target readings for a capacitor rated 45/5 MFD (common on 3-ton to 5-ton residential ACs):
- HERM-to-C: 40.5 to 49.5 MFD (within 10 percent of the printed 45)
- FAN-to-C: 4.5 to 5.5 MFD (within 10 percent of the printed 5)
Below 90 percent on either terminal, the capacitor is bad. Visually: a bulging or domed top on the capacitor case is a confirmed failure, no meter required. OEM dual-run capacitors run $20 to $45. Quality universals of matching MFD and voltage ratings (370V or 440V) work for every non-communicating residential AC.
Step 3: Inspect and test the contactor
Question: “Are the contactor faces clean and the contacts closing fully under power?”
The contactor is a square or rectangular relay inside the condenser, with two large load terminals on each side and two small 24V coil terminals. When the thermostat calls for cool, the 24V coil pulls the contactor's armature down, closing the main contacts and sending line voltage to the compressor and fan.
With power off, visually inspect the contact faces (pop the top cover off most residential contactors or peek between the terminals). Three visible failure modes:
- Pitting and burn marks on the contact faces — high-resistance connection, intermittent operation, excessive heat
- Welded contacts frozen in the closed position — the AC will run continuously regardless of thermostat state, often tripping the compressor overload
- Insect or debris blockage in the contact gap — especially common in southern climates with pole ants or wasps; prevents full closure
If the contactor is visibly damaged, replace it. OEM contactors are specified by amp rating (30A or 40A typical for residential) and pole count (1-pole or 2-pole). Residential OEM contactors run $25 to $60. Quality universals of matching spec work for every non-communicating system.
If the contactor is clean but the AC still will not pull in on a call: measure 24 VAC across the coil terminals during the call. 24 VAC present but armature does not pull in means the coil is open and the contactor is bad. 0 VAC during the call means the fault is upstream — a tripped high-pressure or low-pressure safety switch, a thermostat wire issue, or a failed control board.
Step 4: Check the condenser fan motor
Question: “Does the fan blade spin freely by hand, and does the fan side of the capacitor read within spec?”
If symptom C (compressor running, fan silent) is in play, the fan motor is the next thing to test. With power off at the disconnect:
- Spin the fan blade by hand. It should turn freely with minimal drag. If it stalls, grinds, or will not rotate, the motor bearings are seized and the motor is dead.
- If it spins freely, test the fan side of the capacitor. FAN-to-C should read within 10 percent of the printed value (usually 5 MFD or 7.5 MFD). Below 90 percent, replace the capacitor first and retest — a bad fan terminal on a capacitor often fails before the compressor terminal.
- If both are good and the fan still will not start, the motor windings have likely failed. Measure resistance across the motor leads with the ohmmeter — open windings (infinite resistance) confirms a dead motor.
OEM condenser fan motors are matched to the cabinet by five parameters: horsepower, RPM, voltage, shaft diameter, and shaft length. All five must match. OEM parts carry the manufacturer's part number on a sticker on the motor shell. Residential condenser fan motors run $125 to $350 depending on brand and HP.
Universal fan motors work for older PSC-style motors on single-stage systems. For ECM (electronically commutated) motors on variable-speed systems, use the OEM part only — universal ECMs do not communicate with the control board.
Step 5: Test the compressor for shorts and locked rotor
Question: “Is the compressor shorted to ground, or seized, or healthy?”
Symptom D (breaker trips immediately on startup) can be a dead capacitor, a welded contactor, or a dead compressor. Rule out the cheap failures first — capacitor and contactor — before testing the compressor. If both pass, the compressor is next.
Two tests, with power off at the disconnect and the compressor leads pulled at the contactor:
Test A: Resistance to ground. Set the ohmmeter to its highest range. Measure from each of the three compressor terminals (common, start, run) to a bare copper refrigerant line or the cabinet chassis. Infinite resistance (OL on the meter) is good — the windings are isolated from ground. Any reading, even hundreds of thousands of ohms, means a winding is shorted to ground and the compressor is dead.
Test B: Winding resistance. Measure between the three terminal pairs (C to R, C to S, R to S). Compare against the manufacturer's data (printed on the compressor label or in the service manual). Typical values are 1 to 10 ohms. Open windings (infinite resistance) or dramatically unbalanced readings mean a failed compressor.
A dead compressor is the single most expensive part job on a residential AC: $1,200 to $3,500 for the OEM compressor plus 4 to 8 hours of labor plus refrigerant recovery and recharge. On a 12+ year-old AC with a dead compressor, run the repair-vs-replace calculus before ordering — replacement of the entire condenser is often the better long-term call.
Step 6: If all mechanical parts pass, check the control board and safeties
Question: “Does the control board output 24 VAC to the contactor coil on a cooling call, and are all safety switches closed?”
Symptom E (absolute silence with power confirmed) usually traces to a safety switch or the control board itself. Common safeties on residential AC condensers:
- High-pressure safety switch — opens if refrigerant head pressure exceeds the switch's cutout (typically 450 to 650 psi depending on refrigerant). Causes: dirty condenser coils, failed condenser fan, overcharged system, or restriction in the liquid line.
- Low-pressure safety switch — opens if refrigerant suction pressure drops below the cutout (typically 20 to 40 psi). Causes: refrigerant leak, closed service valve, or a stuck TXV.
- Freeze-stat — opens if evaporator or suction-line temperature drops too low; prevents coil freeze-up.
Measure continuity across each safety switch with power off. Open contacts on a safety switch mean the safety has tripped (or the switch itself has failed) — address the underlying cause before resetting or replacing the switch.
If all safeties are closed and 24 VAC is present at the control board's input but no 24 VAC appears at the contactor-call output terminal during a cooling call, the board is bad. Visible scorch marks, swollen electrolytic capacitors on the board, or a dead LED with input voltage confirmed are all signs of board failure. OEM AC control boards run $150 to $700 depending on the brand and whether the system is single-stage, two-stage, or inverter-driven. Communicating and inverter boards must be OEM; universal boards cannot run the required logic.
Diagnostic flowchart: symptom to confirmed OEM part

The six-step sequence, in short:
- Identify the symptom. Thermostat set to cool, 3 degrees below room temperature. Note what the condenser does (or does not) in the first 60 seconds.
- Test the capacitor. HERM-to-C and FAN-to-C within 10 percent of printed MFD.
- Inspect the contactor. Clean, smooth contact faces; 24 VAC closes the armature cleanly.
- Check the fan motor. Blade spins freely; fan side of capacitor passes.
- Test the compressor. Infinite resistance to ground; winding resistance matches spec.
- Verify safeties and the control board. All safety switches closed; 24 VAC output to the contactor on a cooling call.
The first step that fails is the OEM part to order.
Worked example: 4-ton condenser, humming, fan not spinning
Call: residential 4-ton AC, outdoor unit humming loudly, condenser fan not turning, breaker not tripped, indoor blower running normally.
Step 1 (symptom). Humming without fan rotation = Symptom A. Dual-run capacitor is the first test.
Steps 2-3 (capacitor test). Shut off disconnect, confirm dead with non-contact tester, open service panel, locate capacitor. Printed rating: 45/5 MFD, 440V. Discharged with insulated screwdriver. Multimeter reads:
- HERM-to-C: 31 MFD (should be 45) → 69 percent of rating, failed
- FAN-to-C: 3.8 MFD (should be 5) → 76 percent of rating, failed
Visually: the capacitor top is slightly domed, consistent with internal pressure buildup from electrolyte decomposition.
Fix: ordered an OEM 45/5 MFD 440V dual-run capacitor matched to the AC's model number ($32 part). Installed with the same terminal labeling (HERM to the compressor common, FAN to the fan common, C to the contactor's load leg). Closed the service panel, restored power at the disconnect. Fan started immediately, compressor started within 2 seconds, cooling resumed within 5 minutes.
Total time: 25 minutes. Total parts cost: $32. The entire diagnosis hinged on three measurements — the symptom at the condenser, the MFD readings on the capacitor, and the visual check of the capacitor case.
Common AC diagnosis mistakes
Testing the capacitor without discharging it first. A healthy capacitor holds enough voltage to deliver a painful shock or arc a screwdriver tip. Always short HERM-to-C and FAN-to-C with an insulated screwdriver before touching terminals or putting a meter on it.
Replacing the capacitor and declaring the job done without checking the contactor. A failing contactor and a dead capacitor often appear together — the aging contactor's higher resistance stresses the capacitor into early failure. Replace both if the contactor shows pitting, even if the AC runs after the capacitor swap.
Jumping the contactor to force the AC on for a diagnosis. This bypasses every safety switch in the system (high-pressure, low-pressure, freeze-stat). If a safety is tripped for a real reason — dirty coil, low refrigerant, blocked airflow — running the AC with the contactor jumped can destroy the compressor in minutes.
Ordering a “3-ton condenser fan motor” without the model number. The same 3-ton AC uses different fan motors across generations. Match by HP, RPM, voltage, shaft diameter, and shaft length. Order by the OEM part number on the motor shell if the label is readable.
Installing a universal control board on a communicating or inverter system. YXV, YZH, Trane variable, Carrier Greenspeed, and Lennox XC25 all use boards that run proprietary serial communication or inverter PWM logic. A universal board cannot replace these — the compressor and ECM will not start, or will run in default fallback mode at reduced capacity.
Skipping the indoor side. “AC not cooling” is not always an outdoor-unit problem. A dirty filter, a tripped float switch on the condensate pump, a frozen evaporator from a prior low-charge event, or a dead indoor blower motor can all look identical from the thermostat. Check the indoor side before pulling the condenser's service panel.
Frequently asked questions
Why won't my air conditioner turn on? Most commonly a failed dual-run capacitor. Other causes in order: stuck or burned contactor, tripped high-pressure safety switch, tripped breaker, or failed control board. Diagnose cheapest to most expensive.
My AC is humming but the fan is not spinning. What is wrong? Almost always a failed dual-run capacitor. Shut off power, discharge the capacitor, test with a multimeter in MFD mode. Below 90 percent of printed value on either terminal = replace.
Why does my AC fan not run even though the compressor does? Fan side of the capacitor (smaller MFD value) has failed, or the condenser fan motor is seized. Spin the blade by hand with power off — drag means dead motor.
Why does my AC trip the breaker when it starts? Locked-rotor amperage from a dead capacitor, welded contactor, seized compressor, or shorted compressor winding. Test the capacitor and contactor first; if both pass, measure compressor resistance to ground.
How do I test a dual-run capacitor on an AC? Power off, discharge with insulated screwdriver, multimeter in capacitance mode, measure HERM-to-C and FAN-to-C. Within 10 percent of printed MFD = good. Below 90 percent = replace.
What causes an AC contactor to fail? Pitting from thousands of start cycles, welding of the contacts from a stuck relay or overcurrent, or insects/debris blocking the contact gap. Visual inspection with power off shows the failure.
Why is my AC freezing up with ice on the lines? Evaporator temperature dropped below 32 F. Causes: dirty filter or blocked return (airflow starvation), low refrigerant from a leak, or failed TXV. Replace the filter, let the ice melt, retry. Refreezing = call a licensed tech.
How do I check if the AC compressor is dead? Resistance to ground should be infinite on all three terminals. Winding resistance should match the manufacturer's spec (typically 1 to 10 ohms, balanced across the three windings). Any resistance to ground = shorted compressor, dead.
What is a hard-start kit and when should I install one? A potential-relay + start-capacitor kit that gives an aging compressor extra starting torque. Temporary measure, not a long-term fix. Installing on a healthy compressor shortens its life.
When should I replace an AC control board versus a single component? Replace the board when 24 VAC input is confirmed but no 24 VAC output appears on the contactor-call terminal during a cooling call, when scorch marks or swollen capacitors are visible on the board, or when the fault isolates to the board. Otherwise, replace the single failed component.
Does HVACMORE sell OEM AC parts for diagnosis-driven repairs? Yes. Capacitors, contactors, condenser fan motors, compressors, control boards, TXVs, pressure switches, and crankcase heaters for every major residential brand. Call 855-575-4822 or send a photo of the data plate and the failed component through chat.
Buying from HVACMORE
HVACMORE stocks OEM AC parts for every major residential brand — Goodman, Lennox, York, Trane, Carrier, Rheem, Amana, Bryant, Payne — from $20 capacitors and $30 contactors to $350 ECM fan motors, $700 inverter boards, and $2,500 OEM compressors. Every part is cross-referenced against your model and serial before the order ships, so a diagnosis-driven repair ends with the right OEM part in the box, not a wrong-fit return.
What ordering OEM AC parts from HVACMORE gets you:
- Fitment verified against your AC model and serial before the order ships
- OEM part number cross-check for supersessions and renumbered SKUs
- Free shipping on eligible orders over $500
- Price match if you find the same OEM part number cheaper elsewhere
- Original manufacturer parts warranty preserved when the unit is in-warranty and the replacement is OEM
- 60-Day Money Back Guarantee
- 30-Day Hassle-Free Returns with no restocking fees
Not sure which OEM part your diagnosis points to? Text or email a photo of the data plate and the failed component to the HVACMORE parts team, or call 855-575-4822 — US-based, Monday to Friday 8am–9pm ET, weekends included. One photo of the data plate and one of the failed part is usually all the counter needs to pull the right SKU.
The bottom line
An air conditioner that will not start, will not cool, or trips the breaker is a decision tree, not a mystery. The symptom narrows the failure to one of five parts. The capacitor test takes 60 seconds. The contactor inspection takes a glance. The fan motor shaft turns freely or it does not. The compressor is shorted to ground or it is not. Each step passes or fails cleanly, and the first failure is the OEM part to order. Photograph the data plate, run the sequence, and call HVACMORE at 855-575-4822 with the model, the failed component, and the MFD or resistance reading that pinned the fault. The right part the first time beats three wrong parts in a hot house every time.
Sources
- U.S. Department of Energy — Central Air Conditioning (SEER2 standards, residential AC system overview)
- U.S. Environmental Protection Agency — Section 608 Technician Certification (refrigerant handling, required for any work on sealed systems)
- ENERGY STAR — Central Air Conditioners (certification criteria for high-efficiency residential ACs)
- ASHRAE — American Society of Heating, Refrigerating and Air-Conditioning Engineers (industry standards for residential refrigeration cycle, pressures, and diagnostics)
- Related reading on HVACMORE — York AC Troubleshooting & OEM Parts, Air Conditioner Buying Guide 2026, Repair vs Replace, HVAC Maintenance Guide
OEM AC parts, part supersessions, and warranty terms change over time. Always verify current fitment with the manufacturer or HVACMORE parts before ordering. Any work involving refrigerant lines, high-voltage circuits, or sealed-system components should be performed by a licensed HVAC technician with EPA Section 608 certification.
Ready to upgrade your system?
Free ZIP-based pricing on top-rated HVAC systems
Get instant local pricing and expert help choosing the right AC, furnace, or heat pump for your home.
Shop HVAC Systems